はじめに
id:i-saint さんのこちらの記事(rendering fractals in Unity5 - primitive: blog)に触発されて勉強中です。Raymarching はポリゴンベースでなく、距離関数(distance function)と呼ばれる数式を元にオブジェクトをレンダリングする方法で、工夫次第でスゴイ画が作れるテクニックです。
- raymarching for games - primitive: blog
- wgld.org | GLSL: レイマーチングで球体を描く |
- 全能感UP! GLSLで進めレイマーチング « demoscene.jp
Unity では先の記事で解説したように Command Buffer を使うことによって Deferred Rendering で使う G-Buffer を直接操作することが可能で、G-Buffer へ raymarching の結果を書き出すことによって前後関係も表現でき、Unity のライティングの機能もそのまま利用することが出来ます。
本エントリでは、その導入として最小限のコードをご紹介したいと思います。Raymaching については wgld.org が大変詳しいので、詳細は割愛します。
例
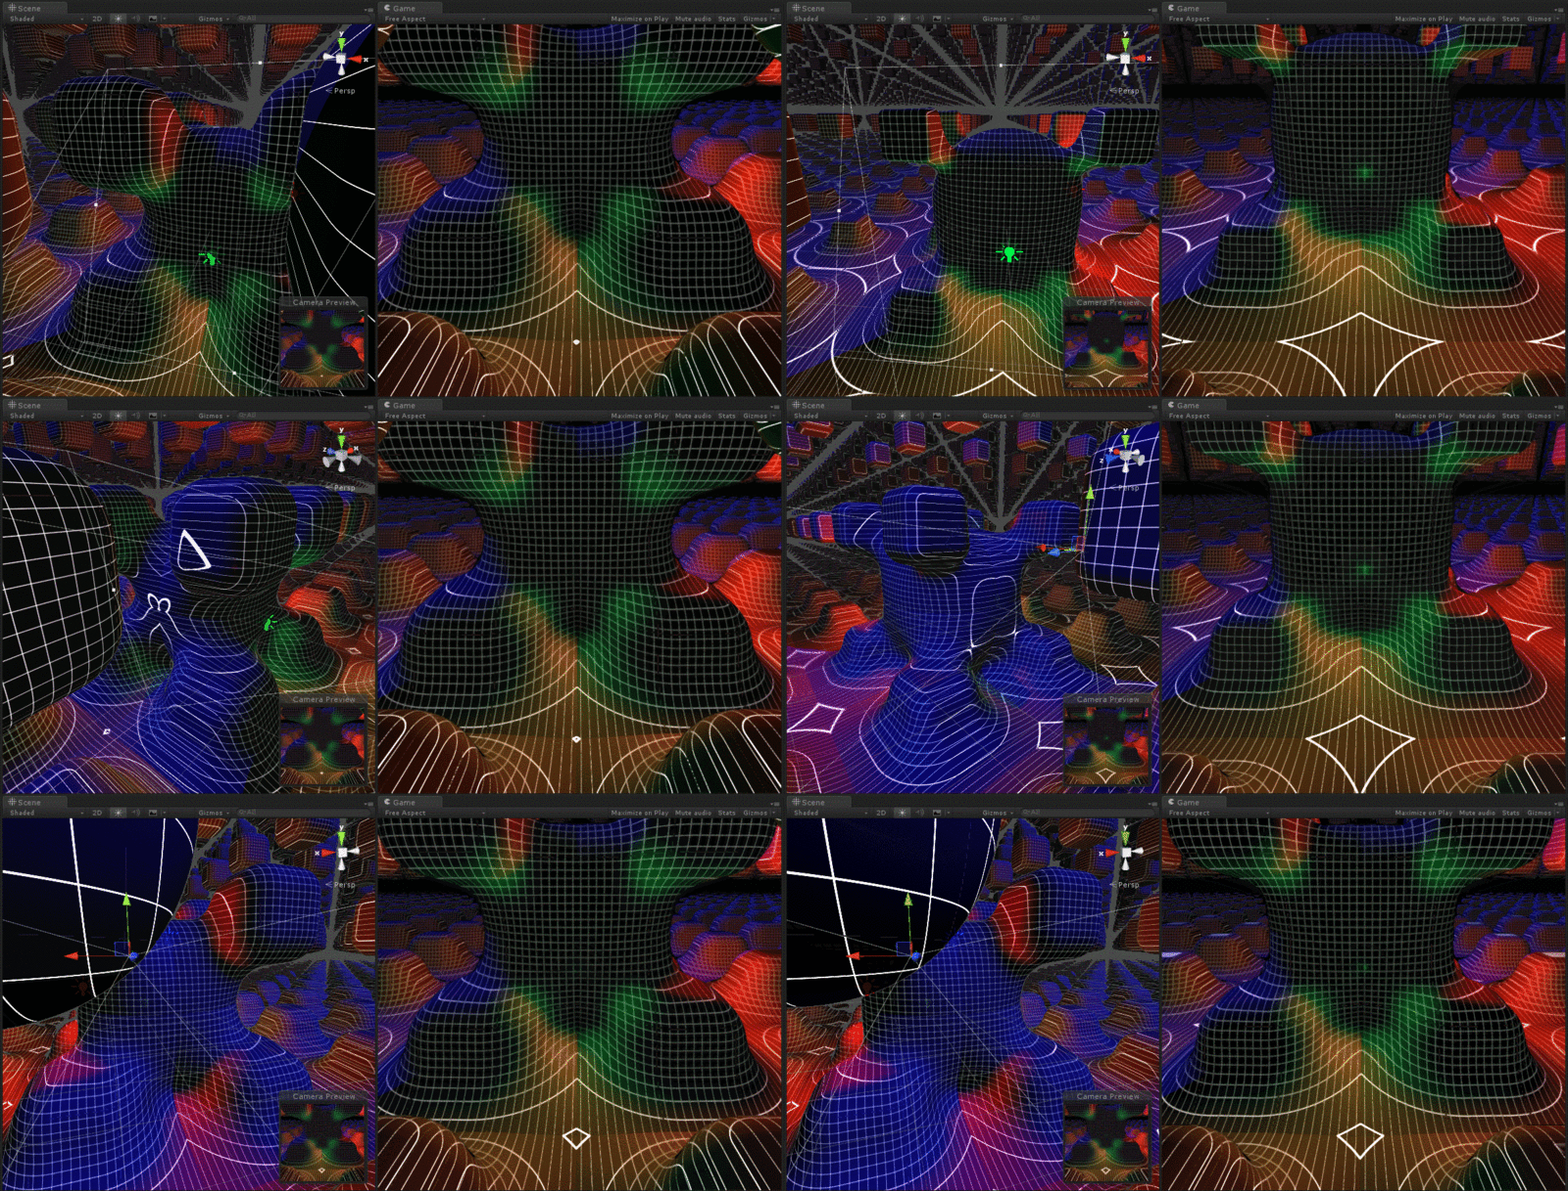
下回りを整えれば 5 行くらいで以下のような図形が出ます。

ダウンロード
サンプルです。
まずは球を出してみる
描いてみる画
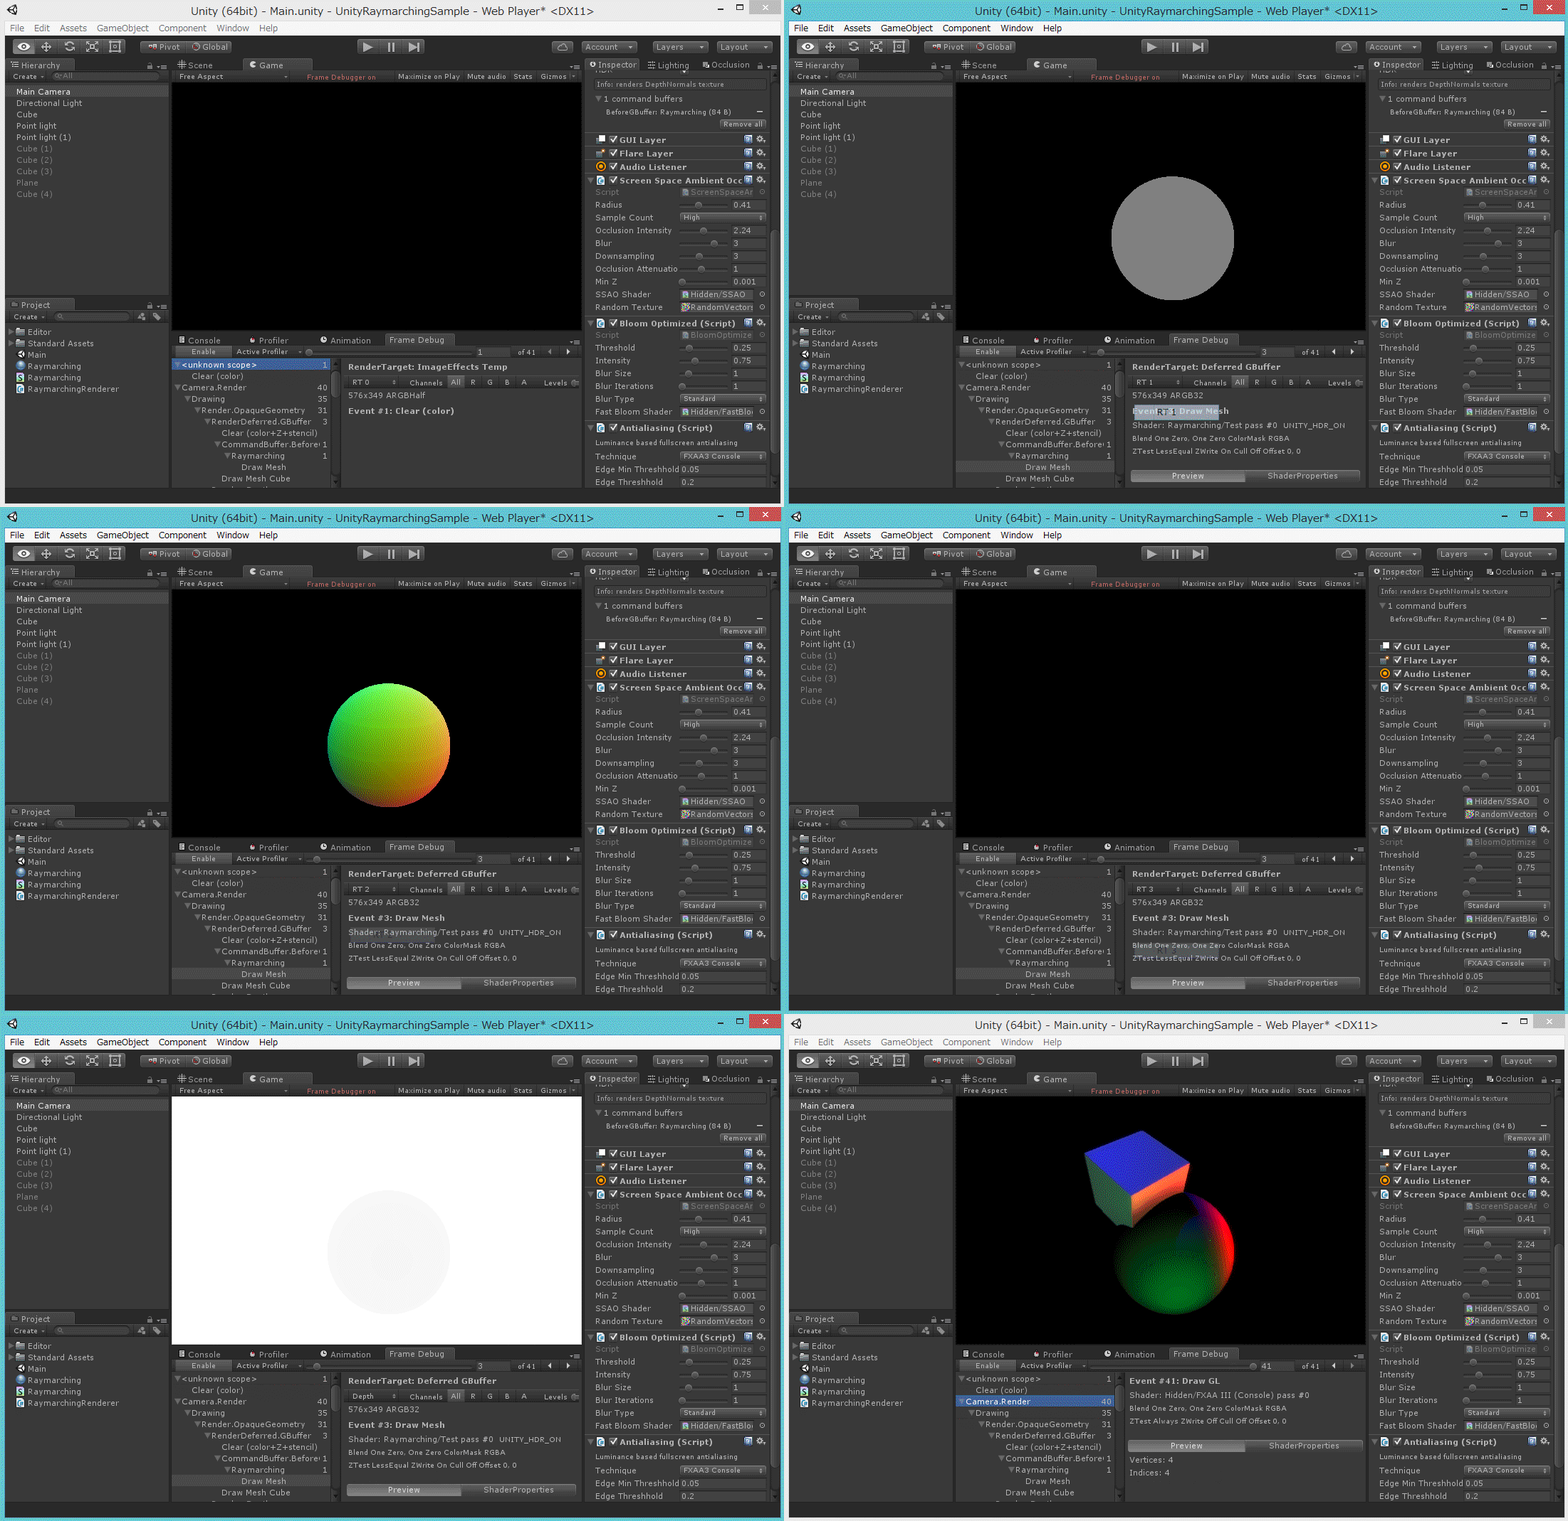
まずは以下のように球を描いてみます。

キューブは普通のポリゴンベースのオブジェクトで、球が Raymarching によって描かれたものです。オブジェクト同士が交差するだけでなく、影も落ちますし、ライティングも行われ、SSAO のような Image Effect も効きます。Deferred Rendering では、G-Buffer(Geometry Buffer)と呼ばれるテクスチャにレンダリングに必要な情報(拡散色、深度、法線など)をオブジェクト全てに対してまとめて書き込んでおき、その情報を使ってまとめてライティングを行うことで、動的なライトを低負荷で大量に配置できるといったメリットがあります。
この G-Buffer に直接シェーダ内で計算した図形の情報を書き込むことで、ポリゴンベースのオブジェクトと同時に描画しても問題のない画が作れる仕組みです。Unity ではデフォルトで Forward Rendering となっているので、Player Settings から Rendering Path を Forward から Deferred に変更する必要があります。
Command Buffer の作成
Command Buffer の解説は以前の記事をご参照下さい。CameraEvent.BeforeGBuffer タイミングでカメラ全面を覆うような板ポリを描くようにし、この板ポリを深度や法線、拡散色などを直接書き込むシェーダを適用したマテリアルで描画します。
RaymarchingRenderer.cs
using UnityEngine;
using UnityEngine.Rendering;
using System.Collections.Generic;

[ExecuteInEditMode]
public class RaymarchingRenderer : MonoBehaviour
{
    Dictionary<Camera, CommandBuffer> cameras_ = new Dictionary<Camera, CommandBuffer>();
    Mesh quad_;

    [SerializeField] Material material = null;
    [SerializeField] CameraEvent pass = CameraEvent.BeforeGBuffer;

    Mesh GenerateQuad()
    {
        var mesh = new Mesh();
        mesh.vertices = new Vector3[4] {
            new Vector3( 1.0f , 1.0f,  0.0f),
            new Vector3(-1.0f , 1.0f,  0.0f),
            new Vector3(-1.0f ,-1.0f,  0.0f),
            new Vector3( 1.0f ,-1.0f,  0.0f),
        };
        mesh.triangles = new int[6] { 0, 1, 2, 2, 3, 0 };
        return mesh;
    }

    void CleanUp()
    {
        foreach (var pair in cameras_) {
            var camera = pair.Key;
            var buffer = pair.Value;
            if (camera) {
                camera.RemoveCommandBuffer(pass, buffer);
            }
        }
        cameras_.Clear();
    }

    void OnEnable()
    {
        CleanUp();
    }

    void OnDisable()
    {
        CleanUp();
    }

    void OnWillRenderObject()
    {
        UpdateCommandBuffer();
    }

    void UpdateCommandBuffer()
    {
        var act = gameObject.activeInHierarchy && enabled;
        if (!act) {
            OnDisable();
            return;
        }

        var camera = Camera.current;
        if (!camera) return;

        if (cameras_.ContainsKey(camera)) return;

        if (!quad_) quad_ = GenerateQuad();

        var buffer = new CommandBuffer();
        buffer.name = "Raymarching";
        buffer.DrawMesh(quad_, Matrix4x4.identity, material, 0, 0);
        camera.AddCommandBuffer(pass, buffer);
        cameras_.Add(camera, buffer);
    }
}
これを OnWillRenderObject() が呼ばれるように、地面のように常に見えるオブジェクトなどに仕掛けておきます。メインのカメラだけでなくすべてのカメラに対して登録することで、Scene 上でも結果を見ることが出来ます。
シェーダ
まずはキューブを出すまでの完成コードを書いてみます。ちょっと長いですが後で要点のみ解説します。
Raymarching.shader
Shader "Raymarching/Test"
{

SubShader
{

Tags { "RenderType" = "Opaque" "DisableBatching" = "True" "Queue" = "Geometry+10" }
Cull Off

CGINCLUDE

#include "UnityCG.cginc"

float sphere(float3 pos, float radius)
{
    return length(pos) - radius;
}

float DistanceFunc(float3 pos)
{
    return sphere(pos, 1.f);
}

float3 GetCameraPosition()    { return _WorldSpaceCameraPos;      }
float3 GetCameraForward()     { return -UNITY_MATRIX_V[2].xyz;    }
float3 GetCameraUp()          { return UNITY_MATRIX_V[1].xyz;     }
float3 GetCameraRight()       { return UNITY_MATRIX_V[0].xyz;     }
float  GetCameraFocalLength() { return abs(UNITY_MATRIX_P[1][1]); }
float  GetCameraMaxDistance() { return _ProjectionParams.z - _ProjectionParams.y; }

float GetDepth(float3 pos)
{
    float4 vpPos = mul(UNITY_MATRIX_VP, float4(pos, 1.0));
#if defined(SHADER_TARGET_GLSL)
    return (vpPos.z / vpPos.w) * 0.5 + 0.5;
#else
    return vpPos.z / vpPos.w;
#endif
}

float3 GetNormal(float3 pos)
{
    const float d = 0.001;
    return 0.5 + 0.5 * normalize(float3(
        DistanceFunc(pos + float3(  d, 0.0, 0.0)) - DistanceFunc(pos + float3( -d, 0.0, 0.0)),
        DistanceFunc(pos + float3(0.0,   d, 0.0)) - DistanceFunc(pos + float3(0.0,  -d, 0.0)),
        DistanceFunc(pos + float3(0.0, 0.0,   d)) - DistanceFunc(pos + float3(0.0, 0.0,  -d))));
}

ENDCG

Pass
{
    Tags { "LightMode" = "Deferred" }

    Stencil
    {
        Comp Always
        Pass Replace
        Ref 128
    }

    CGPROGRAM
    #pragma vertex vert
    #pragma fragment frag
    #pragma target 3.0
    #pragma multi_compile ___ UNITY_HDR_ON

    #include "UnityCG.cginc"

    struct VertInput
    {
        float4 vertex : POSITION;
    };

    struct VertOutput
    {
        float4 vertex    : SV_POSITION;
        float4 screenPos : TEXCOORD0;
    };

    struct GBufferOut
    {
        half4 diffuse  : SV_Target0; // rgb: diffuse,  a: occlusion
        half4 specular : SV_Target1; // rgb: specular, a: smoothness
        half4 normal   : SV_Target2; // rgb: normal,   a: unused
        half4 emission : SV_Target3; // rgb: emission, a: unused
        float depth    : SV_Depth;
    };

    VertOutput vert(VertInput v)
    {
        VertOutput o;
        o.vertex = v.vertex;
        o.screenPos = o.vertex;
        return o;
    }

    GBufferOut frag(VertOutput i)
    {
        float4 screenPos = i.screenPos;
#if UNITY_UV_STARTS_AT_TOP
        screenPos.y *= -1.0;
#endif
        screenPos.x *= _ScreenParams.x / _ScreenParams.y;

        float3 camPos      = GetCameraPosition();
        float3 camDir      = GetCameraForward();
        float3 camUp       = GetCameraUp();
        float3 camSide     = GetCameraRight();
        float  focalLen    = GetCameraFocalLength();
        float  maxDistance = GetCameraMaxDistance();

        float3 rayDir = normalize(
            camSide * screenPos.x +
            camUp   * screenPos.y +
            camDir  * focalLen);

        float distance = 0.0;
        float len = 0.0;
        float3 pos = camPos + _ProjectionParams.y * rayDir;
        for (int i = 0; i < 50; ++i) {
            distance = DistanceFunc(pos);
            len += distance;
            pos += rayDir * distance;
            if (distance < 0.001 || len > maxDistance) break;
        }

        if (distance > 0.001) discard;

        float depth = GetDepth(pos);
        float3 normal = GetNormal(pos);

        GBufferOut o;
        o.diffuse  = float4(1.0, 1.0, 1.0, 1.0);
        o.specular = float4(0.5, 0.5, 0.5, 1.0);
        o.emission = float4(0.0, 0.0, 0.0, 0.0);
        o.depth    = depth;
        o.normal   = float4(normal, 1.0);

#ifndef UNITY_HDR_ON
        o.emission = exp2(-o.emission);
#endif

        return o;
    }

    ENDCG
}

}

Fallback Off
}
ちょっとコードが長いので整理します。まずはレイの定義を見てみます。カメラに関する情報は id:i-saint さんのブログで解説されているものを利用しています。
float4 screenPos = i.screenPos;
#if UNITY_UV_STARTS_AT_TOP
screenPos.y *= -1.0;
#endif
screenPos.x *= _ScreenParams.x / _ScreenParams.y;

float3 camPos      = GetCameraPosition();
float3 camDir      = GetCameraForward();
float3 camUp       = GetCameraUp();
float3 camSide     = GetCameraRight();
float  focalLen    = GetCameraFocalLength();
float  maxDistance = GetCameraMaxDistance();

float3 rayDir = normalize(
    camSide * screenPos.x +
    camUp   * screenPos.y +
    camDir  * focalLen);
カメラの方向に対してレイを伸ばしています。Y 方向を 1 とした時、X 方向は _ScreenParams を使うことでアスペクト比が分かるため求まり、Z 方向は Focal Length を求めることでわかります。
このレイを利用して Raymarching のループを回します。
float distance = 0.0;
float len = 0.0;
float3 pos = camPos + _ProjectionParams.y * rayDir;
for (int i = 0; i < 50; ++i) {
    distance = DistanceFunc(pos);
    len += distance;
    pos += rayDir * distance;
    if (distance < 0.001 || len > maxDistance) break;
}

if (distance > 0.001) discard;
最初は Near Clip(_ProjectionParams.y)からスタートし、スフィアトレーシングで徐々に近づけていく形です。距離関数として与えているのは以下のように球を描くものです。
float sphere(float3 pos, float radius)
{
    return length(pos) - radius;
}

float DistanceFunc(float3 pos)
{
    return sphere(pos, 1.f);
}
こうして得られた distance を使って GBufferOut へ格納します。
struct GBufferOut
{
    half4 diffuse  : SV_Target0; // rgb: diffuse,  a: occlusion
    half4 specular : SV_Target1; // rgb: specular, a: smoothness
    half4 normal   : SV_Target2; // rgb: normal,   a: unused
    half4 emission : SV_Target3; // rgb: emission, a: unused
    float depth    : SV_Depth;
};

...

float depth = GetDepth(pos);
float3 normal = GetNormal(pos);

GBufferOut o;
o.diffuse  = float4(1.0, 1.0, 1.0, 1.0);
o.specular = float4(0.5, 0.5, 0.5, 1.0);
o.emission = float4(0.0, 0.0, 0.0, 0.0);
o.depth    = depth;
o.normal   = float4(normal, 1.0);
GetDepth() は Raymarching の結果得られたワールド空間での位置に View-Projection 行列を掛け、カメラから見た座標へと変換します。GetNormal() はシンプルな偏微分を行っています。
float GetDepth(float3 pos)
{
    float4 vpPos = mul(UNITY_MATRIX_VP, float4(pos, 1.0));
#if defined(SHADER_TARGET_GLSL)
    return (vpPos.z / vpPos.w) * 0.5 + 0.5;
#else
    return vpPos.z / vpPos.w;
#endif
}

float3 GetNormal(float3 pos)
{
    const float d = 0.001;
    return 0.5 + 0.5 * normalize(float3(
        DistanceFunc(pos + float3(  d, 0.0, 0.0)) - DistanceFunc(pos + float3( -d, 0.0, 0.0)),
        DistanceFunc(pos + float3(0.0,   d, 0.0)) - DistanceFunc(pos + float3(0.0,  -d, 0.0)),
        DistanceFunc(pos + float3(0.0, 0.0,   d)) - DistanceFunc(pos + float3(0.0, 0.0,  -d))));
}
ワールド座標をプロジェクション座標へ変換してデプスを 0 ~ 1 の値へと変換します。w の詳細は以下の解説が大変詳しいです。
id:i-saint さんの記事で解説されていたように、OpenGL 系と DirectX 系でデプスの値に差があるため、SHADER_TARGET_GLSL が定義済みかどうかで処理を分けます(手元の Mac で検証したところ、この #if 文の中に入ってくれず...、どなたか原因がおわかりであればご教授下さい)。
Deferred Rendering のベースとライティングのパスでは Stencil バッファはライティング用途に使われます。コード中にあるように 8 bit 目を 1 で立てて置かないとライティングが行われませんので注意が必要です。
Stencil
{
    Comp Always
    Pass Replace
    Ref 128
}
これでスクショのような画が出力されます。

色々試してみる
wgld.org や 距離関数の一覧を見ながら色々試してみます。
繰り返し
float3 mod(float3 a, float3 b)
{
    return frac(abs(a / b)) * abs(b);
}

float3 repeat(float3 pos, float3 span)
{
    return mod(pos, span) - span * 0.5;
}

float DistanceFunc(float3 pos)
{
    return roundBox(repeat(pos, 2.f), 1.f, 0.2f);
}

合成
float torus(float3 pos, float2 radius)
{
    float2 r = float2(length(pos.xy) - radius.x, pos.z);
    return length(r) - radius.y;
}

float floor(float3 pos)
{
    return dot(pos, float3(0.0, 1.0, 0.0)) + 1.0;
}

float smoothMin(float d1, float d2, float k)
{
    float h = exp(-k * d1) + exp(-k * d2);
    return -log(h) / k;
}

float DistanceFunc(float3 pos)
{
    return smoothMin(
        floor(pos),
        torus(
            (pos - float3(0, 1, 0)),
            float2(0.75, 0.25)),
            1.0);
}

ひねり
float torus(float3 pos, float2 radius)
{
    float2 r = float2(length(pos.xy) - radius.x, pos.z);
    return length(r) - radius.y;
}

float3 twistY(float3 p, float power)
{
    float s = sin(power * p.y);
    float c = cos(power * p.y);
    float3x3 m = float3x3(
          c, 0.0,  -s,
        0.0, 1.0, 0.0,
          s, 0.0,   c
    );
    return mul(m, p);
}

float DistanceFunc(float3 pos)
{
    return torus(twistY(pos, 2.0), float2(2.0, 0.6));
}

テクスチャ投影
float u = (1.0 - floor(fmod(pos.x, 2.0))) * 10;
float v = (1.0 - floor(fmod(pos.z, 2.0))) * 10;

GBufferOut o;
...
o.emission = tex2D(_MainTex, float2(u, v)) * 3;
...

アニメーション
float DistanceFunc(float3 pos)
{
    float r = abs(sin(2 * PI * _Time.y / 2.0));
    float d1 = roundBox(repeat(pos, float3(6, 6, 6)), 1, r);
    float d2 = sphere(pos, 3.0);
    float d3 = floor(pos - float3(0, -3, 0));
    return smoothMin(smoothMin(d1, d2, 1.0), d3, 1.0);
}

フラクタル
ちょっと重いですが。
float RecursiveTetrahedron(float3 p)
{
    p = repeat(p / 2, 3.0);

    const float3 a1 = float3( 1.0,  1.0,  1.0);
    const float3 a2 = float3(-1.0, -1.0,  1.0);
    const float3 a3 = float3( 1.0, -1.0, -1.0);
    const float3 a4 = float3(-1.0,  1.0, -1.0);

    const float scale = 2.0;
    float d;
    for (int n = 0; n < 20; ++n) {
        float3 c = a1;
        float minDist = length(p - a1);
        d = length(p - a2); if (d < minDist) { c = a2; minDist = d; }
        d = length(p - a3); if (d < minDist) { c = a3; minDist = d; }
        d = length(p - a4); if (d < minDist) { c = a4; minDist = d; }
        p = scale * p - c * (scale - 1.0);
    }

    return length(p) * pow(scale, float(-n));
}

おわりに
ループを増やすと結構な負荷になってしまいますが、気をつけていればかなり凝った表現でも 60 fps キープできそうな感じがします。ようやく基礎のところが出来たので、ここから色々と追加していくエフェクトの勉強をしたり、当たり判定を入れたりと試していきたいです。